![]()
Roller shutters are more than just a window treatment; they provide security, insulation, and energy efficiency to your home or business. DIY roller shutter installation can be a cost-effective way to enjoy the benefits of roller shutters without breaking the bank. This article will guide you through the entire process, from selecting the right roller shutters for your needs to installing them with ease. With the proper tools and patience, you can transform your space with a roller shutter installation project.
Benefits of Roller Shutters
Before diving into the installation process, it’s important to understand the benefits of roller shutters. These window treatments offer several advantages, including:
- Security: Roller shutters provide an additional layer of protection against break-ins, vandalism, and other potential threats.
- Insulation: The insulating properties of roller shutters help to regulate indoor temperatures, keeping your home or business comfortable throughout the year.
- Energy Efficiency: By reducing heat transfer, roller shutters can help to lower your energy bills and reduce your carbon footprint.
- Noise Reduction: Roller shutters can block out external noise, providing a quieter environment for work or relaxation.
- Privacy: Roller shutters can be closed to provide complete privacy from nosy neighbors or passersby.
- Light Control: You can easily adjust the level of light entering your space by opening or closing the roller shutters.
Choosing the Right Roller Shutters
Selecting the right roller shutters for your needs is crucial for a successful installation. Consider the following factors when making your decision:
- Material: Roller shutters are typically made from aluminum, steel, or PVC. Aluminum shutters are lightweight and resistant to corrosion, making them a popular choice for residential applications. Steel shutters are more robust and offer enhanced security, while PVC shutters are an affordable option with good insulation properties.
- Style: Roller shutters come in various styles, from traditional slats to modern perforated designs. Choose a style that complements the architecture and aesthetic of your home or business.
- Motorized vs. Manual: Roller shutters can be operated manually, using a crank, or with a motorized system. Motorized shutters offer greater convenience and can be integrated with smart home systems for added functionality.
- Customization: Many roller shutter manufacturers offer customizable options, including colors, finishes, and sizes. Make sure to choose a shutter that fits your specific requirements.
Preparing for Installation
Before you begin the roller shutter installation process, gather the necessary tools and materials. You will need:
- Tape measure
- Level
- Pencil
- Drill
- Screwdriver
- Screws and wall plugs
- Ladder
- Safety goggles and gloves
In addition, ensure that you have ample space to work and that the installation area is clean and free of obstacles.
Measuring and Cutting the Roller Shutter
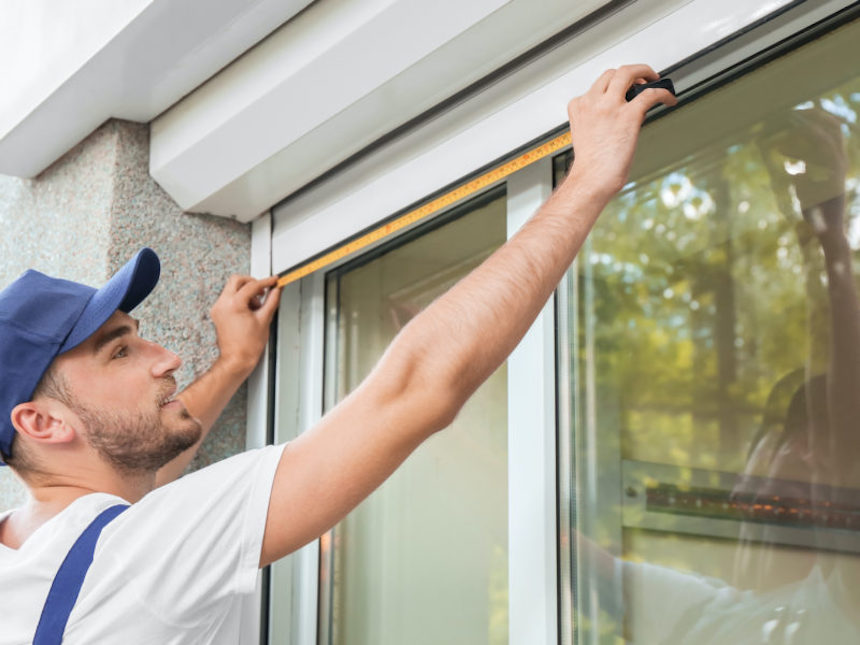
Proper measurement is critical for a successful roller shutter installation. Follow these steps to measure your window or door opening:
- Measure the width of the opening at the top, middle, and bottom. Use the smallest measurement as the width for your roller shutter.
- Measure the height of the opening on both sides and in the center. Use the smallest measurement as the height for your roller shutter.
- Add any necessary allowances for the roller shutter’s mounting brackets, side guides, and other hardware.
Once you have your measurements, cut the roller shutter slats and side guides to size using a hacksaw or another cutting tool suitable for the shutter material.
Assembling and Installing the Roller Shutter
Follow these steps to assemble and install your roller shutter:
- Attach the mounting brackets to the roller shutter’s axle, ensuring that they are securely fastened.
- Lift the roller shutter into place and mark the positions of the mounting brackets on the wall or window frame.
- Drill pilot holes at the marked positions and insert wall plugs.
- Secure the mounting brackets to the wall or window frame with screws.
- Attach the side guides to the shutter slats and secure them to the wall or window frame using screws and wall plugs.
- If you’re installing a motorized roller shutter, connect the motor to a power source and test its functionality before attaching the shutter to the axle.
- Attach the roller shutter to the axle and secure it with screws or other fasteners.
- Test the roller shutter’s operation, making any necessary adjustments to ensure smooth and even movement.
Troubleshooting and Maintenance
Regular maintenance is essential for the longevity and performance of your roller shutters. Clean the shutters and lubricate the moving parts periodically to prevent dirt and debris from causing damage. Additionally, inspect the shutters for signs of wear or damage, making any necessary repairs promptly.
If you encounter problems with your roller shutters, consult the manufacturer’s troubleshooting guide or seek professional assistance.
DIY roller shutter installation is a practical and cost-effective way to add security, insulation, and energy efficiency to your home or business. With the right tools, patience, and attention to detail, you can successfully complete a home improvement project. By following the tips and tricks outlined in this article, you’ll be well on your way to enjoying the many benefits of roller shutters.
- Essential Tips for Hiring Family Lawyers - May 15, 2025
- How To Properly Put On and Take Off a Disposable Respirator - March 15, 2024
- Unlocking the Doors to Your Dream Destination: Why You Need a Skilled Migration Visa Lawyer - February 15, 2024
More from Anne Cohen Writes
 6 Quick Tips for DIY Home Repairs
 8 Home Improvement Projects You Shouldn’t Do Yourself
 New and Improved: The Process of Replacing Your Front Door
 How To Fit an AC Unit Into Your House Décor Plans
 Essential Tools and Equipment for DIY Roof Repairs: A Comprehensive Guide
 DIY Home Plumbing Fixes for Every Homeowner